Chapter 1 Intro to R and RStudio
You may have heard about coding or the R programming language, but figuring out how to get started can be a hurdle; at least it was for us. In this guide, we will walk you through the process of setting up R and RStudio, both locally on your computer and remotely using the University of Toronto’s JupyterHub R Studio server.
1.1 R Language
R is the programming language we’ll code in. R is hosted on the Comprehensive R Archive Network (CRAN) and is one of the most popular programming languages for statisticians and scientists alike due to its vast array of tools and packages.
A quick aside, but don’t be intimidated by the term “coding”. Coding is simply writing instructions for the computer to execute. The only catch is has to be in a language that both we, humans, and the computer can understand. For our needs we’re using R, and like any language, R has it’s own syntax, rules, and quirks which we’ll cover in later chapters.
1.2 RStudio
RStudio is a popular integrated development environment (IDE) specifically designed for working with R, providing a user-friendly interface and various productivity features. It’s where you’ll actually be typing your code and interacting with R. Again, R is a language, and you need somewhere to write it down to make use of it. Writing in English can be done with a pencil and notepad or a word processor filed with useful tools to help you write.
R and RStudio work in tandem to provide an efficient and seamless experience for data analysis, visualization, and model building. RStudio enhances the R workflow with features like code editing, interactive visualization, version control, and package management.
1.3 Setting Up Your Environment
Students learning R have two options: working locally or remotely.
Working locally involves installing R and RStudio on their computer, providing direct control over data and code without an internet connection. On the other hand, working remotely enables access to RStudio through a web browser, avoiding local installations and allowing collaboration. For R programming in chemistry courses at the University of Toronto we recommend working remotely using the University of Toronto’s JupyterHub so we can ensure a stable R Studio environment where all relevant packages are installed and ready to go. Working locally might make sense for independent work as it doesn’t require an internet connection. More details on each option are provided below.
1.3.1 Working Remotely (Recommended for Coursework)
Working remotely means accessing R and RStudio from a remote server or cloud-based platform.
UofT JupyterHub RStudio server
To facilitate remote access to RStudio, the University of Toronto provides a JupyterHub R Studio server. This allows you to access RStudio from any web browser, eliminating the need for local installations. With this, you can perform data analysis, collaborate with others, and work on your R projects remotely with ease.
To get started, visit UofT JupyterHub. You will need to log in with your UofT credentials to access the RStudio environment.
- While working remotely, you may need to upload data to the RStudio server or download analysis results. The RStudio interface allows you to upload files directly from your computer to the server and vice versa.
- When working remotely, ensure that you save your R scripts and analysis files on the server. This will allow you to continue your work from any device with internet access.
- Most R packages are pre-installed on the University of Toronto’s RStudio server. However, if you require additional packages, we will soon learn how to install packages.
Remember that while working remotely, a stable Internet connection is essential to ensure a smooth and uninterrupted experience. Additionally, always remember to save your work and log out properly after each session to maintain the security of your data. Happy coding!
1.3.2 Working Locally
When you work locally, you need to install both R and RStudio on your personal computer or a machine that you physically have access to.
1.3.2.1 Downloading R and RStudio
You can download the latest build of R for your operating system here. Choose the appropriate version for your operating system (Windows, macOS, or Linux) and follow the installation instructions.
You can download the latest version of RStudio here.
Once you have both R and RStudio downloaded, go ahead and open up RStudio.
1.4 Using RStudio
When you open your RStudio (either locally or remotely), you’ll be greeted with an interface divided into numerous panes. We’ve highlighted the major ones in the image below:
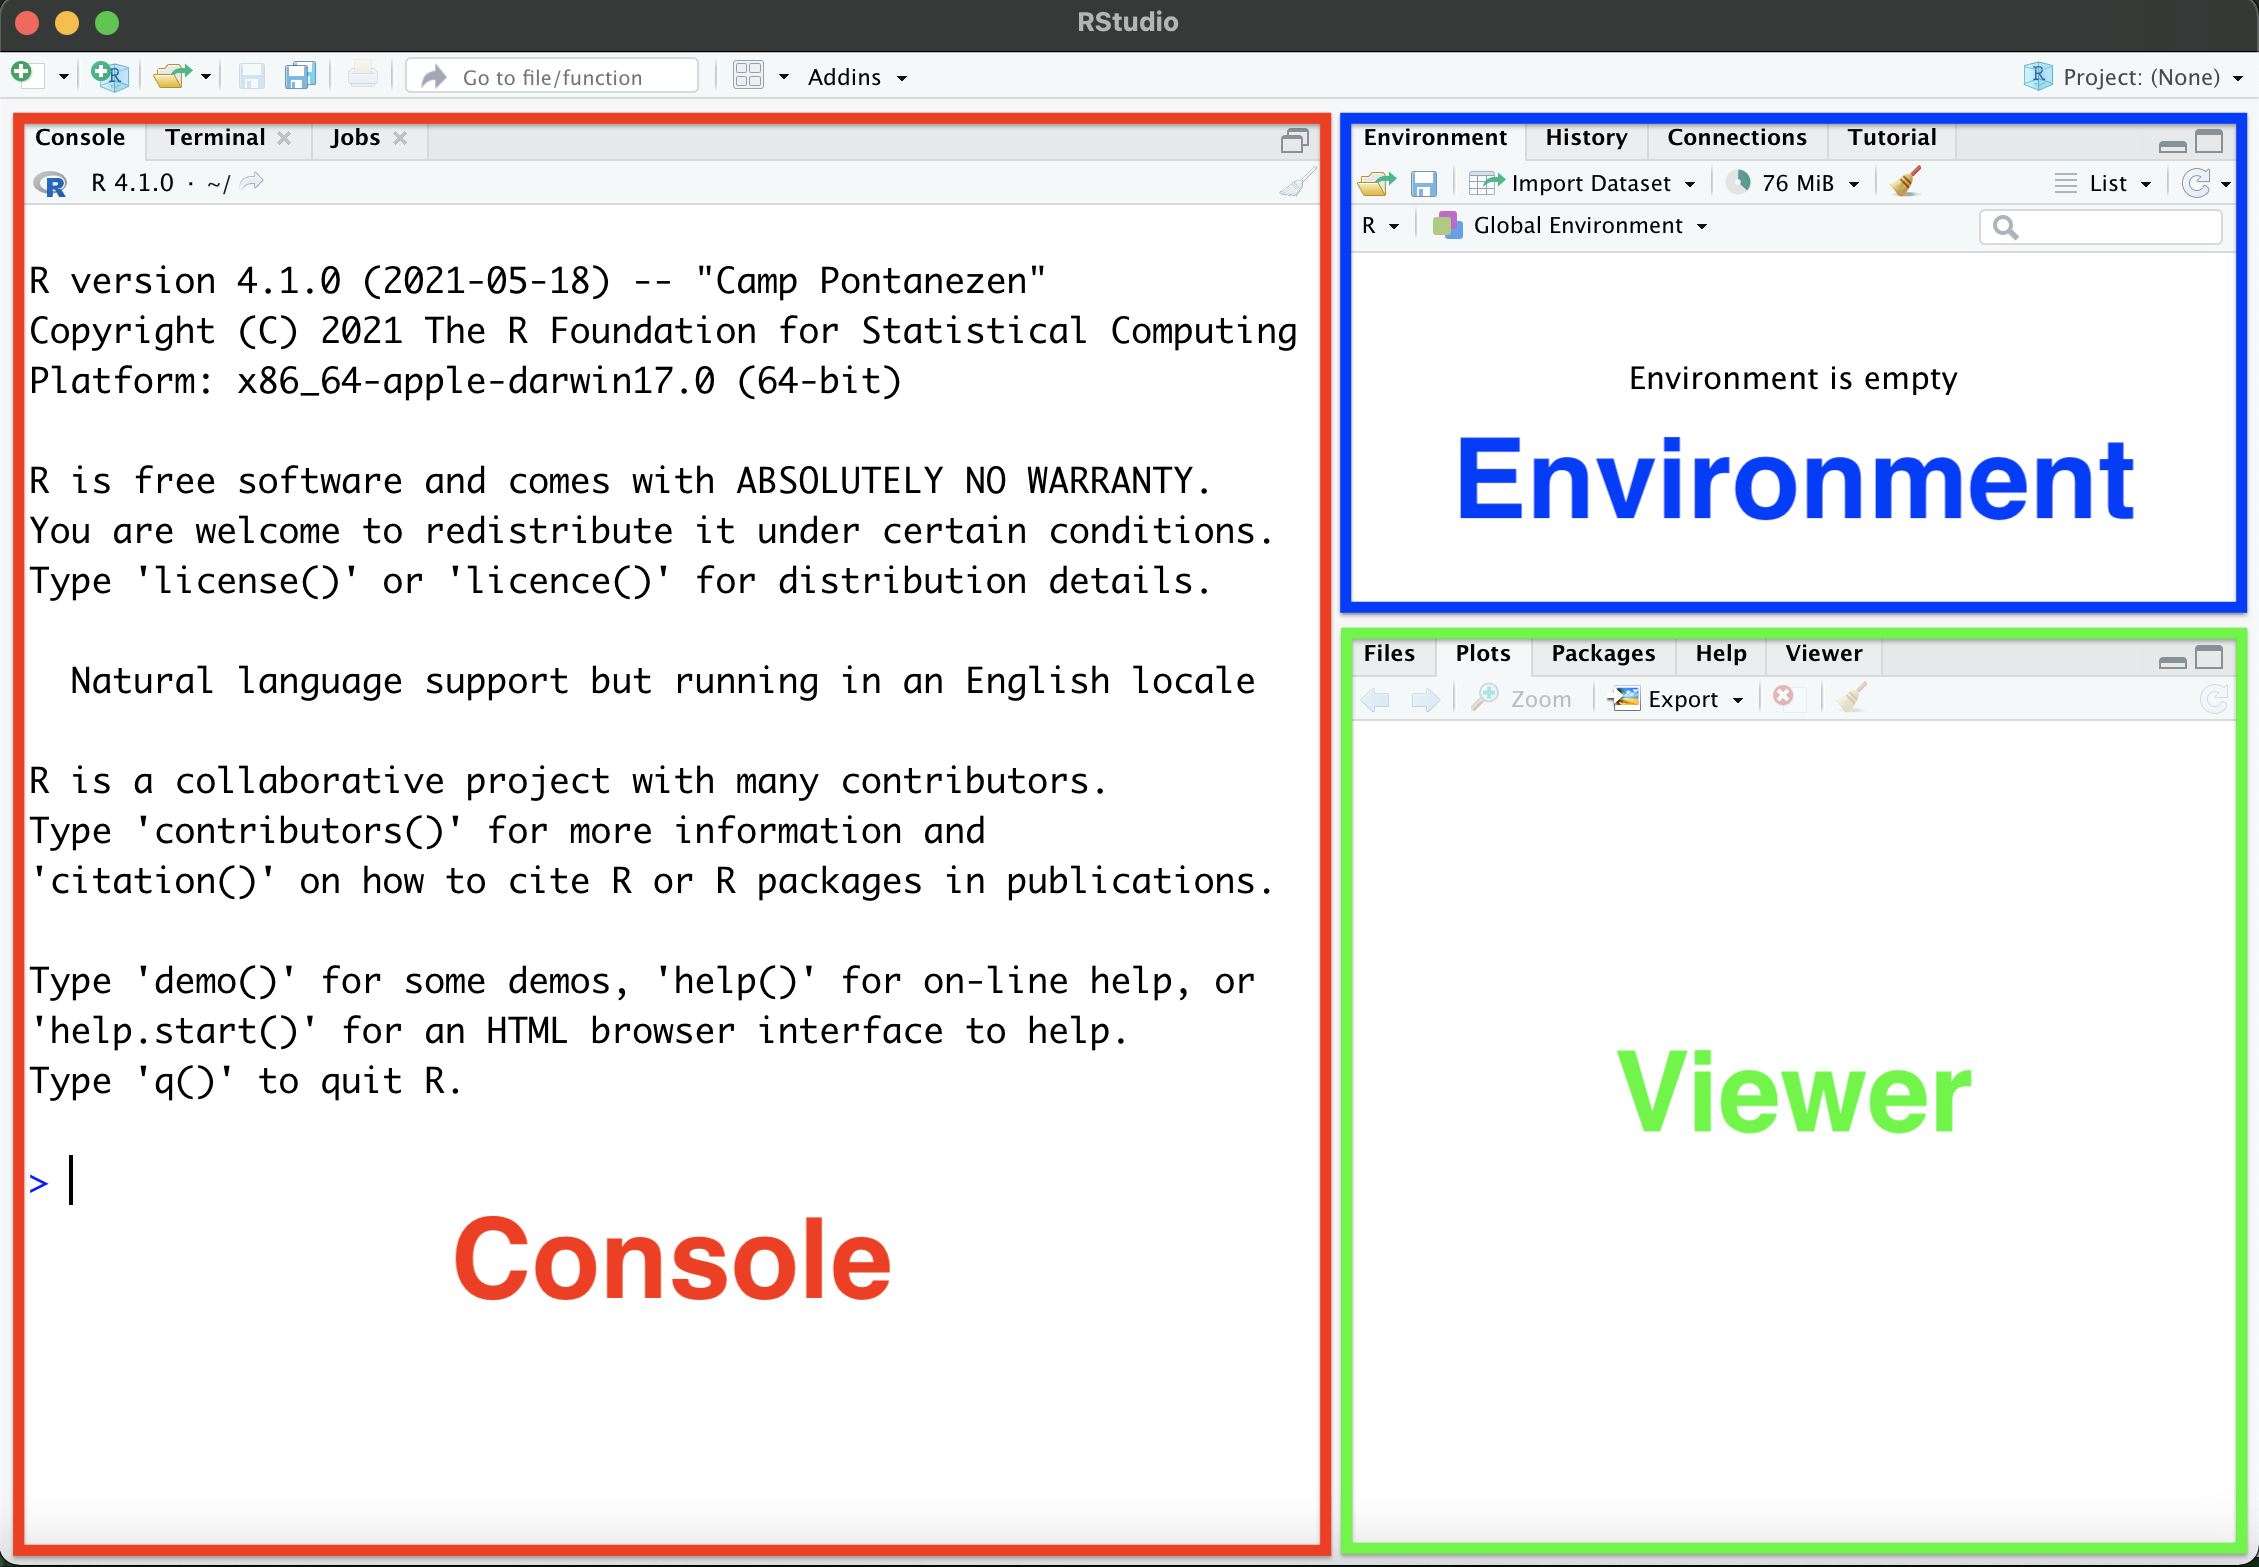
Each pane serves a specific role:
- The console allows you to directly type and run your code. It also provides messages, warnings, and errors from any code you run.
- The environment window lists all variables, data, and functions you’ve created since the start of your coding session.
- The viewer shows your outputs, help documents, etc. which each has their own tab.
1.5 Running R Code
You can run bits of R code directly from the console. Throughout the book, code you can copy and run will look like this:
## [1] 4Notice that both the code (the first part) and what the code outputs (the second part) are shown. Throughout this book code outputs will be preceded by ##. You can run code directly from the console. It’s handy for short and sweet snippets of code, something that can be typed in a single line. Examples of this is the install.packages() function, or to use R as a calculator:
## [1] 6## [1] 15.70796However, working like this isn’t very useful. Imagine printing a book one sentence at a time, you couldn’t really go back and edit earlier work because it’s already printed. That’s why we write out code in scripts. Scripts are similar to recipes, in that they’re a series of instructions that R evaluates from the top of the script to the bottom. More importantly, writing your code out in a script makes it more readable to humans (presumably this includes you). Don’t undervalue the usefulness of legible code. Your code will execute in seconds or minutes but it might take you hours to understand what it does.
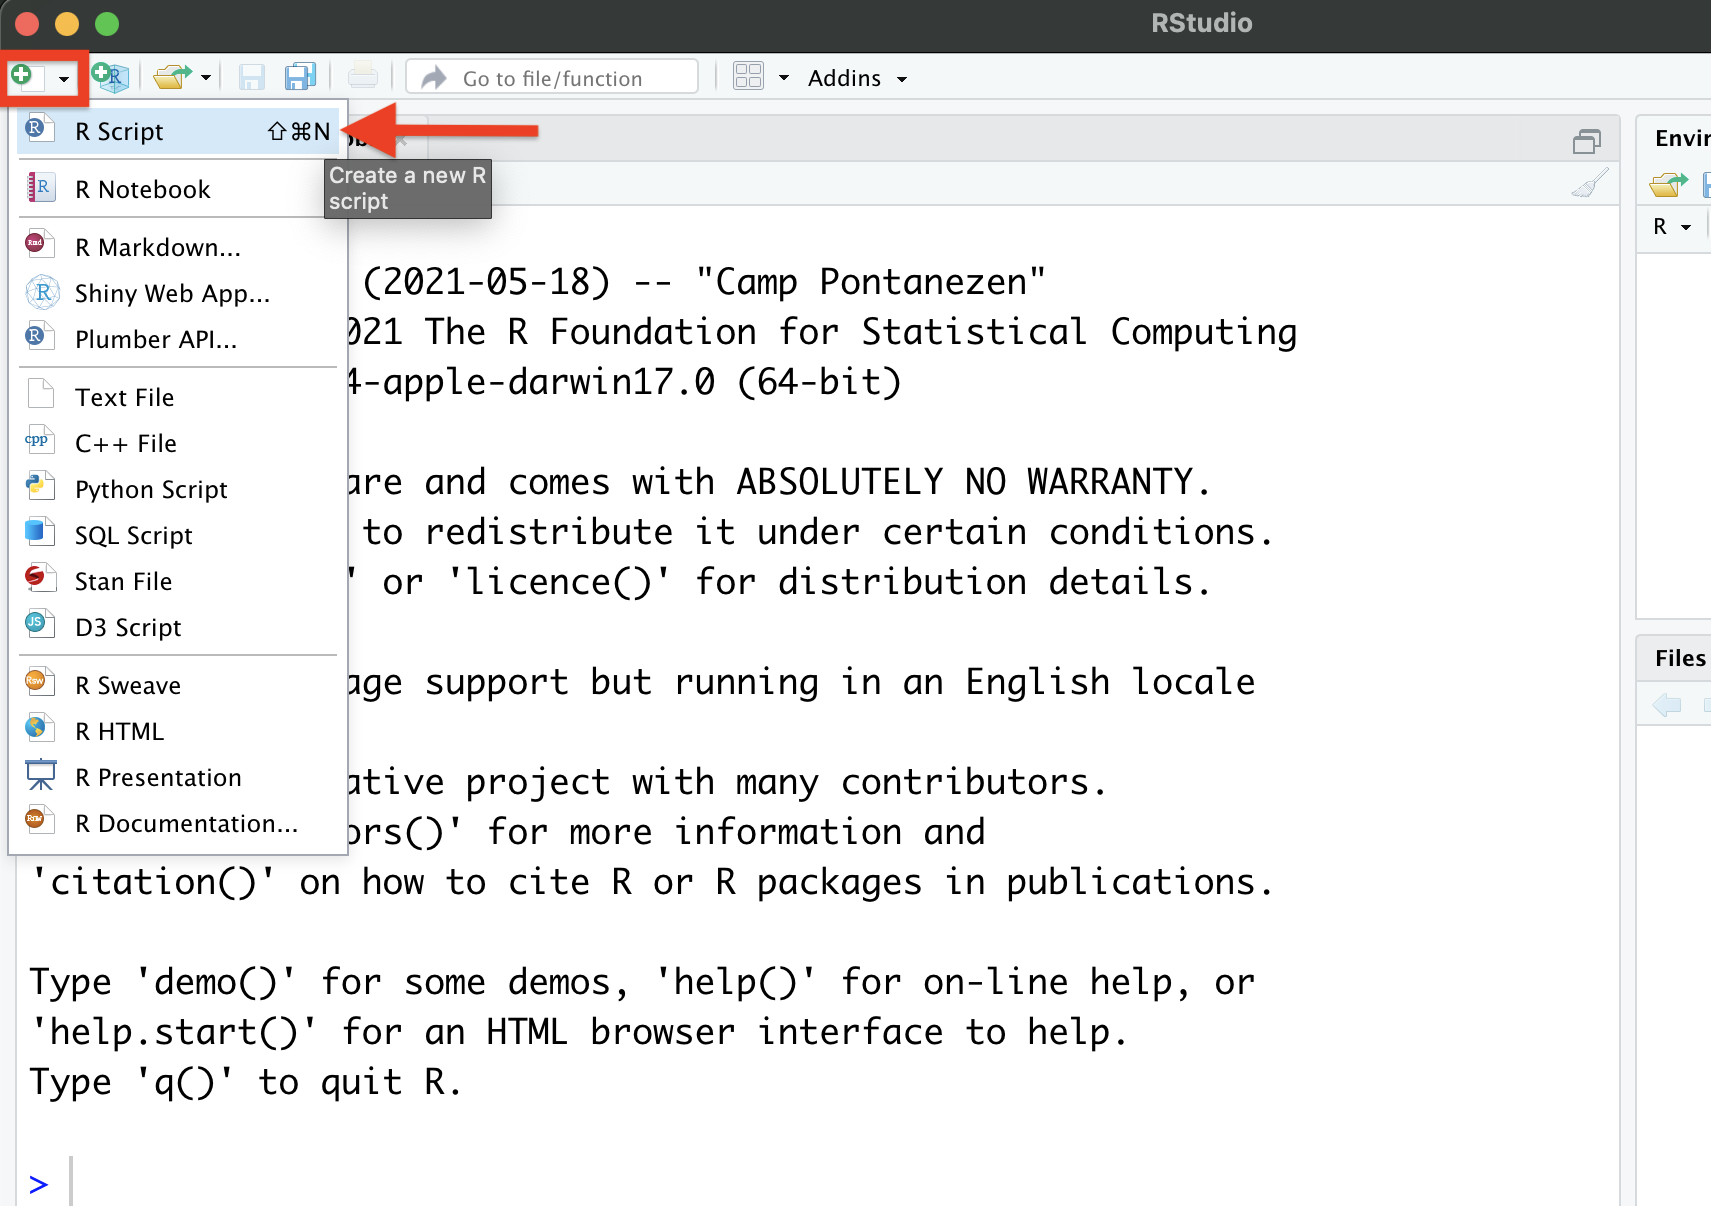
Let’s open up a new script in RStudio by going to File->New File->R Script, or by clicking on the highlighted button in the image below.
This should open up a new window in the RStudio interface, as shown in the following image.
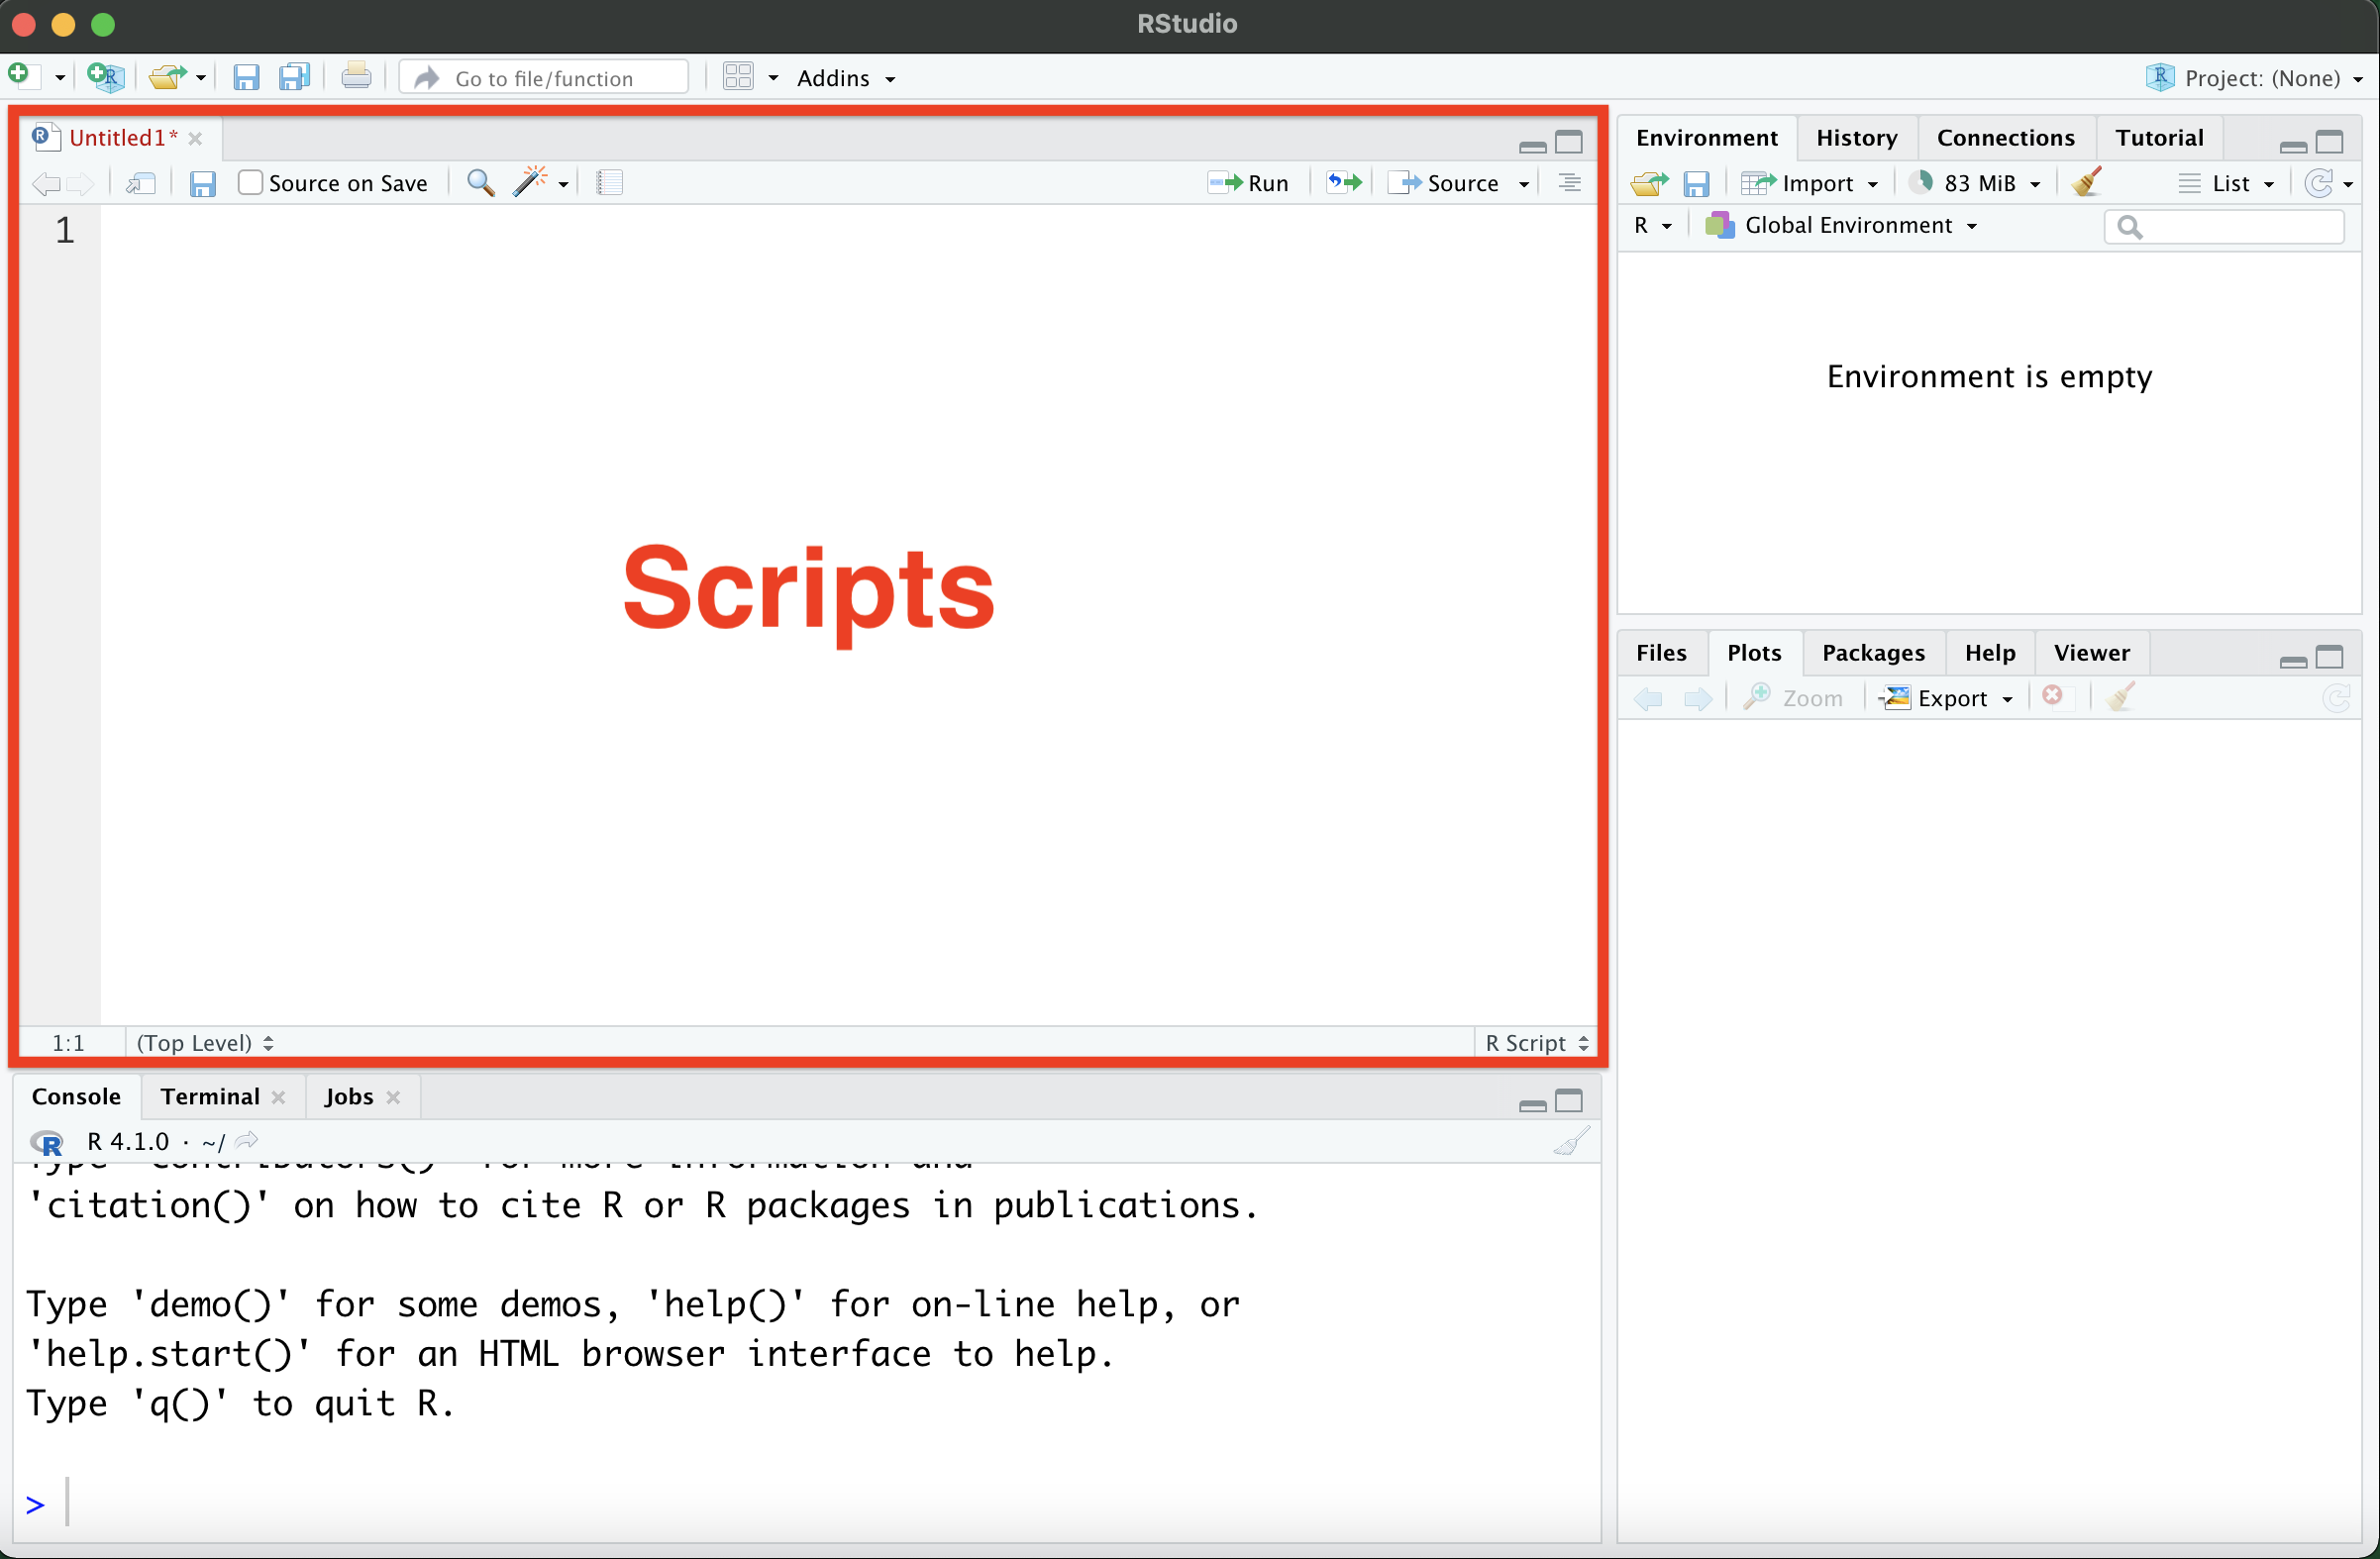
You can copy and paste the code above into the script, save it, edit it, etc. and ultimately run specific lines of code by highlighting them and pressing Ctrl+Enter (Cmd+Enter on Mac), or by clicking the “Run” button in the top right corner of the Scripts window. You can copy an entire block of code using the copy button in the top right corner of the code block. In this way, this research is a tool to learn R coding and also a repository for code that you can copy and use.
We’ll dive into the basics of coding in R in the next chapter.
1.6 Customizing RStudio
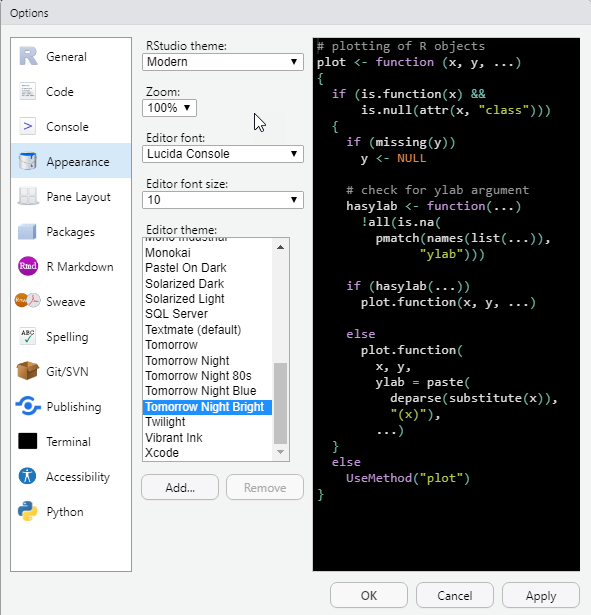
As many of us spend an absurd amount of time staring at bright screens, some of you may be interested in setting your RStudio to Dark Mode.
You can customize the appearance of your RStudio interface by clicking Tools->Global Options, or RStudio->Preferences on Mac, then clicking “Appearance” on the left. Select your preferred Editor Theme from the list.
1.7 Where to get help
Given the popularity of R if you’ve run into an issue it’s very likely that someone else has too and they’ve complained about it and someone else has almost certainly solved it! An often unappreciated aspect of coding/data science is knowing how to get help, how to search for it, and how to translate someone’s solutions to your unique situation.
Places to get help include:
- Google, Stack Overflow, etc. When in doubt Google it.
- Using built-in documentation:
- In the bottom-right pane in RStudio, click on the “Help” tab
- Or, in the Console type a
?followed by a name or function you want to learn more about, like?pior?install.packages.
- Reference books such as the invaluable R for Data Science, which inspired this entire project.
- Ask for help, from TAs or instructors if using this book as a resource for a class, or from colleagues or peers.
1.8 Summary
In this chapter we’ve covered:
- How to use RStudio to do R programming, both remotely and locally.
- The benefits of working remotely using platforms like the University of Toronto’s JupyterHub RStudio server.
- Resources for help when you get stuck, including Google, Stack Overflow, and reference books.
In the next chapter we’ll break down how to setup your work in R for legibility, simplicity, and reproducibility. After all, the person cursing any of your sloppy work will invariably be you, so be kind to yourself, and do it right the first time.
1.9 Exercise
Now that you’ve learned the basics of setting up and customizing R and RStudio, let’s put some of that knowledge into practice.
1.9.1 Setup
- Access UofT JupyterHub RStudio server here.
- (Optional) Change your RStudio appearance as you like.
1.9.2 Basic R Commands
- In the
Consoletab, write an expression to calculate 10 plus 5 and press enter. - Create a new R script and type in the following commands:
- Run the script. What is the output?